I am highlighting oranges today. 4 year old, Chef Izabella here. My family and I love oranges.
Oranges are available fresh almost year round in some form of seasonal variety. Oranges are typically inexpensive too, especially when bought in a 5 or 10 pound bag. We buy oranges in bulk from local farm stands about once a month. We also love to pick fresh oranges from our neighbor's tree. They are the best tasting oranges I've ever had.
I Love to peel a freshly picked orange, outside on a warm afternoon. Once I peel back that first section of the orange, my nose is instantly met with a delicious aroma of citrus perfection. I start to peel faster, so that my taste buds can smile with that first bite of the delectable, sweet, juicy orange. I love the sticky, sweet smell of the remaining juice on my hands, especially if a gusty breeze blows by, in which case I usually jump up and twirl to the music of the nearby wind chimes, as the scent of orange dances in the air.
A good juicy orange forces me to wash my hands afterwards.
We like to juice oranges and enjoy fresh orange juice with breakfast. We freeze left over juice so that we can use it in sauces or dressings later. It's convenient to freeze orange juice in an ice cube tray, and pop out a couple juice cubes for a homemade dressing or sauce later.
We use the orange peel or zest in a lot of things. The orange zest adds a pop of color and a zing of flavor to many dishes. We'll add orange zest to our chicken dishes, crepes, pancakes, dressings, pestos, cookies, quinoa, pastas and more.
Oranges are loaded with vitamin C, so although the saying goes "an apple a day keeps the doctor away" I'd strongly suggest that an orange a day keeps the doctor away, especially during cold season. Oranges have about 60-70 calories per orange, which make oranges an ideal afternoon snack.
Well let's get to the nitty gritty. My favorite use for freshly squeezed orange juice, is in fresh orange juice popsicles. We like to squeeze our oranges, add a bit of raw sugar to the juice, dice up freshly picked strawberries and pour the juice over the berries. We let the popsicle molds freeze for a few hours and then voila... we enjoy our fresh popsicles. They are better than any store bought popsicle. So indulge in your own Vitamin C rich treat for dessert tonight. Click here for my orange popsicle video.
HOME
IZZY'S DEMO VIDEOS
Breakfast With Bacon and a Kiss
4 year old, Chef Izabella, here. I have been trying to decide which meal of the day is my favorite. This is a tough one, since each meal presents an opportunity to make great food and to sit and enjoy the food with the ones I love. However, I have concluded that although all meals and snacks are great... breakfast is my favorite.
I especially love weekend brunch with the whole family.
Just like a car needs fuel to get from one place to another, our bodies need energy from food to jump start our day. Breakfast should be power packed with lots of nutrition, love and quality time together.
One of my favorite foods in life (besides chocolate) is bacon. Seriously, if my mom ever wants to track us down like a homing beacon device... she just starts to saute up some bacon. Everyone gravitates toward the kitchen. Our breakfasts and brunches almost always include bacon.
We also love waffles, pancakes, mini souffles, crepes, oatmeal with fruit and nuts, egg scrambles, cinnamon rolls, smoothies, frittatas, biscotti and more.
What are some of your favorite breakfast meals?
Plan a breakfast date with your loved ones soon. Allocate an hour or two for the breakfast. Do all the preparation, cooking and clean up together (designate age appropriate tasks to everyone). Talk and laugh and play fun music as you spend time together. Sit and sip some orange juice or sparkling cider in a fancy glass. Dip biscotti in hot cocoa, coffee or chocolate milk.
Linger. Laugh. Listen. Enjoy breakfast with bacon and a kiss with the ones you love, today!
Chef Izabella's Pancake Demo Video
Salute and cheers,
Chef Izabella
HOME
IZZY'S DEMO VIDEOS
I especially love weekend brunch with the whole family.
Just like a car needs fuel to get from one place to another, our bodies need energy from food to jump start our day. Breakfast should be power packed with lots of nutrition, love and quality time together.
One of my favorite foods in life (besides chocolate) is bacon. Seriously, if my mom ever wants to track us down like a homing beacon device... she just starts to saute up some bacon. Everyone gravitates toward the kitchen. Our breakfasts and brunches almost always include bacon.
We also love waffles, pancakes, mini souffles, crepes, oatmeal with fruit and nuts, egg scrambles, cinnamon rolls, smoothies, frittatas, biscotti and more.
What are some of your favorite breakfast meals?
Plan a breakfast date with your loved ones soon. Allocate an hour or two for the breakfast. Do all the preparation, cooking and clean up together (designate age appropriate tasks to everyone). Talk and laugh and play fun music as you spend time together. Sit and sip some orange juice or sparkling cider in a fancy glass. Dip biscotti in hot cocoa, coffee or chocolate milk.
Linger. Laugh. Listen. Enjoy breakfast with bacon and a kiss with the ones you love, today!
Chef Izabella's Pancake Demo Video
Salute and cheers,
Chef Izabella
HOME
IZZY'S DEMO VIDEOS
Birthday Cake All Year Long
My mom and I frequently task ourselves with making the cake for the birthday guest of honor. This is our gift to him/her. We always add lots of love... and chocolate to every cake.
I love the time spent with my mom while we make the special birthday cake. We laugh a lot. We learn as we measure out all of the ingredients. We get creative with sprinkles and powdered sugar and other little decorative items.
We hope to encourage other parents and kids to make more birthday cakes this year. It's easy to run to the store and buy a store bought cake. But in the time it takes to load up the car, drive to the store, buy and pay for the cake.... you could be half way if not all the way done with your delicious homemade cake.... made with love and quality time together.
Cook Out Loud and spend quality time together in the kitchen.
Salute, Chef Izabella
HOME
IZZY'S DEMO VIDEOS
Get Festive at Christmastime
4 year old, Chef Izabella (aka: Chef Izzy) here. It's almost Christmas. I love being in the Christmas spirit. I have a few thoughts about Christmas.
1. We should love one another by sharing with one another.
Share food with friends, family and neighbors. You can make the food with loved ones and share the food with loved ones. You can also buy nice treats and share them with others.
Serve others who are less fortunate than yourself at a food kitchen. Or donate food to a food drive.
We love to support Feeding America. Most of the donations get used very efficiently and go directly to the people who need it.
Share your toys too! As a kid, I love my toys, but I find it refreshing to donate some of my toys to less fortunate kids. This is especially kind to do during the holidays.
We love to donate to the Vietnam Veterans of America. They typically pick up within 24 hours. Find an organization near you, and donate warm sweaters, blankets, toys and other gently used household items today.
2. Help out around the house. Not because "someone is watching you do good deeds" but because you have a big heart and want to be a contributor in your home. If you are four years old like me, you can do a lot (with adult supervision): (a) carefully help set and clear the dinner table (b) help transfer laundry from the washer to the dryer; easier if you have a front loader (c) help take out the trash cans (d) help with the cooking and baking (e) help open the back door to "let the dog out" in the morning (f) help grab a diaper or throw something away, for your parents; if you have a baby sibling (g) help by putting your toys away without being asked to do so (h) help by putting your dirty clothes directly into your laundry bin in your closet (i) help wrap the gifts, if you are good with little scissors... help cut the paper... help tear and place the tape, etc.
To my younger readers, what are some things you like to do to help out?
3. Make a ginger bread house and have your parent or older sibling, write your last name on it. Or, you can try to write some of the letters yourself, like I do.
Do some additional festive Christmas cooking. We like to make our Christmas Biscotti, our Cheesecake Christmas bites and our red and green Christmas tortillas (use this recipe but use red and green food gels to add a Christmas flare). Of course we love to share the food we make.
4. Add some sparkle wherever you go. We like to add a little bit of sparkle to our cheeks with face glitter. We also like to add glitter to our reindeer food. Here's our reindeer food recipe AND our demo video. We add a bit of oats, glitter and shiny hearts and sprinkle it on the lawn so the reindeer know where to land on Christmas Eve.
5. Say some prayers and/or meditations together as a family and write a gratitude list of everything you are grateful for. At the end of the day, you will probably conclude, like we do... that we already have our Christmas gifts right in front of us. We have our loved ones - and they are the best gifts in the world.
6. Be prompt in writing and mailing or handing out your thank you cards. Often times family members mail packages or hand deliver them to us. Don't just unwrap it like lightening, say "thanks" and race onto the next gift. Savor each gift. Give the gift giver eye contact, and genuinely say "thank you" from your heart. Write your thank you notes in a timely fashion and remember to say "thank you" in person or over the phone, skype or facetime. Be grateful. Gifts cost money and each gift should be cherished. If you received $10 in a check or cash, buy your "thank you" cards with this money.
Have a very Merry Christmas and a Happy New Year.
If you are breathing and alive... you are tremendously blessed.
Buon Natale. Chef Izabella
HOME
IZZY'S DEMO VIDEOS
1. We should love one another by sharing with one another.
Share food with friends, family and neighbors. You can make the food with loved ones and share the food with loved ones. You can also buy nice treats and share them with others.
Serve others who are less fortunate than yourself at a food kitchen. Or donate food to a food drive.
We love to support Feeding America. Most of the donations get used very efficiently and go directly to the people who need it.
Share your toys too! As a kid, I love my toys, but I find it refreshing to donate some of my toys to less fortunate kids. This is especially kind to do during the holidays.
We love to donate to the Vietnam Veterans of America. They typically pick up within 24 hours. Find an organization near you, and donate warm sweaters, blankets, toys and other gently used household items today.
2. Help out around the house. Not because "someone is watching you do good deeds" but because you have a big heart and want to be a contributor in your home. If you are four years old like me, you can do a lot (with adult supervision): (a) carefully help set and clear the dinner table (b) help transfer laundry from the washer to the dryer; easier if you have a front loader (c) help take out the trash cans (d) help with the cooking and baking (e) help open the back door to "let the dog out" in the morning (f) help grab a diaper or throw something away, for your parents; if you have a baby sibling (g) help by putting your toys away without being asked to do so (h) help by putting your dirty clothes directly into your laundry bin in your closet (i) help wrap the gifts, if you are good with little scissors... help cut the paper... help tear and place the tape, etc.
To my younger readers, what are some things you like to do to help out?
3. Make a ginger bread house and have your parent or older sibling, write your last name on it. Or, you can try to write some of the letters yourself, like I do.
Do some additional festive Christmas cooking. We like to make our Christmas Biscotti, our Cheesecake Christmas bites and our red and green Christmas tortillas (use this recipe but use red and green food gels to add a Christmas flare). Of course we love to share the food we make.
4. Add some sparkle wherever you go. We like to add a little bit of sparkle to our cheeks with face glitter. We also like to add glitter to our reindeer food. Here's our reindeer food recipe AND our demo video. We add a bit of oats, glitter and shiny hearts and sprinkle it on the lawn so the reindeer know where to land on Christmas Eve.
5. Say some prayers and/or meditations together as a family and write a gratitude list of everything you are grateful for. At the end of the day, you will probably conclude, like we do... that we already have our Christmas gifts right in front of us. We have our loved ones - and they are the best gifts in the world.
6. Be prompt in writing and mailing or handing out your thank you cards. Often times family members mail packages or hand deliver them to us. Don't just unwrap it like lightening, say "thanks" and race onto the next gift. Savor each gift. Give the gift giver eye contact, and genuinely say "thank you" from your heart. Write your thank you notes in a timely fashion and remember to say "thank you" in person or over the phone, skype or facetime. Be grateful. Gifts cost money and each gift should be cherished. If you received $10 in a check or cash, buy your "thank you" cards with this money.
Have a very Merry Christmas and a Happy New Year.
If you are breathing and alive... you are tremendously blessed.
Buon Natale. Chef Izabella
HOME
IZZY'S DEMO VIDEOS
Celebrate Christmas, in the Kitchen
In our home, we love Christmas time. Christmas means spending quality time with loved ones, baking lots of fun Christmas treats in the kitchen - and being merry, loving and kind to one another.
Jesus came to show us how to love one another perfectly. He lived a life of service and kindness, and he always loved others before himself.
His birth is represented at Christmas time. We can honor Him by loving one another all year long, and especially by loving one another even more authentically and deeply, at Christmas time. Let's show love this season by serving others.
Christmas is a perfect time to make new friends. What better way is there to make new friends, than by sharing yummy treats with them?
We love making our Christmas biscotti and sharing them with friends and neighbors.
Go ahead and make them in your home and share them with new friends, old friends, family and loved ones, this Christmas season.
Biscotti make great gifts. You can place 4-6 biscotti in a small plastic bag. Seal off all the air inside. Tie the end with a red or green ribbon. Place a "to and from" sticker on the bag with the appropriate information on it. Or, you can take a large mason jar and fill it with biscotti and tie a ribbon around it, and gift it to someone as well. Or, take an even larger see-through glass pitcher of some kind, fill it with biscotti, put on the air tight lid and put a bow around it. This gift will be cherished.
Biscotti tend to get gobbled up quickly, but if you are storing them, do so in an airtight container for up to one week.
Recommendation: We enjoy dipping our biscotti in coffee, hot cocoa, tea, milk or chocolate milk. Get creative!
We also love to make and share out Christmas Cheesecake Bites. They are a beautiful little dessert appetizer that will make a splash at any Christmas party. The kids love to swirl in the red and green food gel with a toothpick. You can also gift these little cheesecake bite treasures. Place 4 on a small appetizer plate and gently cover with plastic wrap. Place a nice Christmas sticker on top.
We find that food related gifts from the heart make the most meaningful gifts of all.
Kids are SO capable. They can do almost anything with good instruction, patience and practice. Give your kids the gift of spending quality time with them in the kitchen this holiday season.
Here's the biscotti recipe: Izabella's Christmas Biscotti
Here's the biscotti demo video: How to Make Christmas Biscotti
Cheesecake bite recipe: Izabella's Christmas Cheesecake Bites
Here's the cheesecake bite demo video: How to Make Christmas Cheesecake Bites
Click Here for some more Kid Friendly Recipes
HOME
IZZY'S DEMO VIDEOS
Mini Savory Treats - Good for Mind and Body
Hello. 3 Year Old, Chef Izabella (aka: Chef Izzy), here. My mom and I have been cooking up a storm lately. A current food trend in our home, has been baking and cooking mini savory treats. Mini treats are filling and nutritious. We like to throw garden fresh herbs and vegetables into them. Here are links to four of my favorite mini savory treats.
1) Mini Chicken Pot Pie Empanadas
2) Mini Puff Pastry Meat, Cheese and Basil Sandwiches
3) Mini Frittatas
4) Mini Quiches
I'm three, so I like mini treats. I have found however, that adults and kids alike, both enjoy food served in mini portions. In French they call a single bite appetizer an "amuse bouche". This is usually served like an appetizer, before serving the main meal, it's just slightly smaller.
We believe that mini treats can be served as an appetizer or as the main dish. If serving as a main dish, just note that your recipe may only serve 4 as a main dish, whereas it might serve 12 as an appetizer.
Small bites or mini treats tend to get gobbled up rather quickly. I've observed at parties and gatherings, that trays with small bites on them, are usually half empty within the first half hour. It's usually a good idea, to have more treats on reserve, to replenish the food trays.
As a toddler, I am really into practicing my counting skills. When my mom and I make small treats, I like to count them, throughout the process as we make them. I count the dough rounds for our empanadas or mini quiches, as we cut them out with biscuit cutters. I count the mini muffin tins as we line the muffin pans. I count the final empanadas as I brush the egg wash onto them. When we plate our mini treats onto a serving platter, I even count them one more time. We tend to gobble a few along the way, so our starting number is often less than the final morsel count.
We like to use fun cookie cutter shapes whenever possible. We use fun shapes to cut out mini servings of our large frittata rounds. We also use fun shapes to cut out our puff pastry dough for our mini sandwiches. We eat with our eyes first, so pretty garnishes, fun colors and fun shapes appeal to me as a toddler. When food looks fun, I'm more inclined to try it!
I also gain incredible dexterity and motor control, while assembling and making small treats. For instance, when I brush the egg wash onto the puff pastry or empanadas, I am careful to brush just a small amount onto each treat. I am careful to avoid dripping excess egg everywhere. When I scoop mini muffin batter into mini muffin tins using a small ice cream scooper, I am careful to get the batter into the tin, not all over the pan or counter. I'm as careful when I spoon quiche filling into my mini quiche shells in the mini muffin pan. When I cut out dough rounds with a biscuit cutter, I do it with intention and precision, carefully placing the biscuit round on top of the desired dough area. I try to maximize the number of dough rounds I can get out of the rolled out dough. I have learned that I must visualize what I'm going to do before I do it. I also work slowly and carefully. There is no need to rush the process. Practice does make perfect!
So, the point is, HAVE FUN WITH FOOD. Parents and guardians, get in the kitchen with your little ones. We love to spend quality time with you, especially in the kitchen!
Click Here for some more Kid Friendly Recipes.
HOME
IZZY'S DEMO VIDEOS
1) Mini Chicken Pot Pie Empanadas
2) Mini Puff Pastry Meat, Cheese and Basil Sandwiches
3) Mini Frittatas
4) Mini Quiches
I'm three, so I like mini treats. I have found however, that adults and kids alike, both enjoy food served in mini portions. In French they call a single bite appetizer an "amuse bouche". This is usually served like an appetizer, before serving the main meal, it's just slightly smaller.
Small bites or mini treats tend to get gobbled up rather quickly. I've observed at parties and gatherings, that trays with small bites on them, are usually half empty within the first half hour. It's usually a good idea, to have more treats on reserve, to replenish the food trays.
As a toddler, I am really into practicing my counting skills. When my mom and I make small treats, I like to count them, throughout the process as we make them. I count the dough rounds for our empanadas or mini quiches, as we cut them out with biscuit cutters. I count the mini muffin tins as we line the muffin pans. I count the final empanadas as I brush the egg wash onto them. When we plate our mini treats onto a serving platter, I even count them one more time. We tend to gobble a few along the way, so our starting number is often less than the final morsel count.
We like to use fun cookie cutter shapes whenever possible. We use fun shapes to cut out mini servings of our large frittata rounds. We also use fun shapes to cut out our puff pastry dough for our mini sandwiches. We eat with our eyes first, so pretty garnishes, fun colors and fun shapes appeal to me as a toddler. When food looks fun, I'm more inclined to try it!
I also gain incredible dexterity and motor control, while assembling and making small treats. For instance, when I brush the egg wash onto the puff pastry or empanadas, I am careful to brush just a small amount onto each treat. I am careful to avoid dripping excess egg everywhere. When I scoop mini muffin batter into mini muffin tins using a small ice cream scooper, I am careful to get the batter into the tin, not all over the pan or counter. I'm as careful when I spoon quiche filling into my mini quiche shells in the mini muffin pan. When I cut out dough rounds with a biscuit cutter, I do it with intention and precision, carefully placing the biscuit round on top of the desired dough area. I try to maximize the number of dough rounds I can get out of the rolled out dough. I have learned that I must visualize what I'm going to do before I do it. I also work slowly and carefully. There is no need to rush the process. Practice does make perfect!
So, the point is, HAVE FUN WITH FOOD. Parents and guardians, get in the kitchen with your little ones. We love to spend quality time with you, especially in the kitchen!
Click Here for some more Kid Friendly Recipes.
HOME
IZZY'S DEMO VIDEOS
Utilize Your Little One's High Energy in the Morning
Hello there. 3 year old Chef Izabella (aka: Chef Izzy) here. My mom and I cook together just about every day. Allow me to expand on how cooking in the kitchen with my mom, enriches my life as a 3 year old:
1) I feel like a capable contributor in my home. I make a difference. I can help out in some small way with every meal. We have to eat 3 meals a day. Whether I help brush the braising liquid over the spare ribs, or I help kneed the bread dough, or I help roll out the pate brisee, or I simply whisk the homemade dressing ingredients together, I am helping my mom. This makes me feel important and significant.
2) I learn to follow instructions with specific boundaries, especially when it comes to adhering to our kitchen safety rules. My mom makes the rules and boundaries in the kitchen, clear. I love new challenges. My mom allows me to try new, fun techniques in the kitchen with her, as long as I am a good listener and I obey her closely. I know that she has my safety as her top priority. This is a key life lesson, that I will take with me in every stage of my life.
3) I enhance my cognitive, motor and spatial abilities as I work in the kitchen. I portion the appropriate amount of dough, or meat loaf, or pancake batter, etc in my mind as we are cooking. Sometimes I'll score the food with my hand, to make the right portion sizes. I know that 1 cup is more than 1/2 cup. I even know that when I cut my waffle into quarters (we also call them 4's) using a blunt knife, that if I cut them in half again, I end up with 8 triangles. I count mini paper muffin cups as I line a muffin pan. I know that there are 24 little holes in a mini muffin pan. And there are 12 holes in a regular muffin pan.
4) I have gained incredible dexterity from working in the kitchen, which has helped my writing skills on paper. Using a biscuit cutter to cut out dough rounds after I roll out dough, for our mini quiches or biscuits has helped! Folding dough rounds in half after I fill them to make our empanadas has helped! Crimping the empanada edges with a fork has helped! Scoring ridges on our gnocchi dumplings has helped! Cracking and separating eggs has helped! Rolling our tortilla dough into little balls, pressing them into the tortilla press and then tossing them back and forth to lighten the dough has helped! You get the point! Dexterity comes from working in the kitchen!
5) I am really gifted and talented. I gain confidence in my abilities every day. When I crack eggs and separate them for my mom, some days I crack all the eggs perfectly. Other days one slips. I keep trying. I know that with practice, I improve every single day. The point is, I'm 3 years old, and I can separate and crack eggs almost flawlessly. This skill has been acquired over the last year. I feel pretty awesome!
When I wake up in the morning, I literally am a bundle of energy waiting to erupt. My mom, transforms this energy by allowing me to help out in our home. I can help her make the beds. I can help her transfer the laundry from the washer to the dryer. The most fun way to use up some of my energy, is to help her make breakfast every day. She'll set 3 eggs on the kitchen island, with a whisk, a large bowl, a bit of cream, and some salt and pepper. She'll say, "Ok darling, crack the eggs, add the cream, add a pinch of salt and pepper and whisk them up". And you know what. She can turn and look the other way and cut up our fruit for breakfast, while I get the eggs ready for her to scramble up. Then I wash my hands and I help her set the table. It might seem easier to throw me in front of the television, so she can get breakfast ready more quickly on her own, but revisit notes 1-5 above. You'll see why the time investment in allowing your little ones to help, is vitally important and rewarding in the long run. Many days, after we clean up our breakfast mess, my mom will let me help her prepare our dinner that will be slow braised all day. When I eat my food, I take a large amount of pride, in knowing that I helped make it!
So for my older readers, please take some extra time and patience, and let your little ones help you out in the kitchen. For my younger readers, remember to follow instructions vigilantly. This will make your caretaker want to include you more often.
Enjoy your day. Cheers and Salute! Chef Izabella
For some cool recipes, check out my mom's site at: Cook Out Loud
HOME
IZZY'S DEMO VIDEOS
1) I feel like a capable contributor in my home. I make a difference. I can help out in some small way with every meal. We have to eat 3 meals a day. Whether I help brush the braising liquid over the spare ribs, or I help kneed the bread dough, or I help roll out the pate brisee, or I simply whisk the homemade dressing ingredients together, I am helping my mom. This makes me feel important and significant.
2) I learn to follow instructions with specific boundaries, especially when it comes to adhering to our kitchen safety rules. My mom makes the rules and boundaries in the kitchen, clear. I love new challenges. My mom allows me to try new, fun techniques in the kitchen with her, as long as I am a good listener and I obey her closely. I know that she has my safety as her top priority. This is a key life lesson, that I will take with me in every stage of my life.
3) I enhance my cognitive, motor and spatial abilities as I work in the kitchen. I portion the appropriate amount of dough, or meat loaf, or pancake batter, etc in my mind as we are cooking. Sometimes I'll score the food with my hand, to make the right portion sizes. I know that 1 cup is more than 1/2 cup. I even know that when I cut my waffle into quarters (we also call them 4's) using a blunt knife, that if I cut them in half again, I end up with 8 triangles. I count mini paper muffin cups as I line a muffin pan. I know that there are 24 little holes in a mini muffin pan. And there are 12 holes in a regular muffin pan.
4) I have gained incredible dexterity from working in the kitchen, which has helped my writing skills on paper. Using a biscuit cutter to cut out dough rounds after I roll out dough, for our mini quiches or biscuits has helped! Folding dough rounds in half after I fill them to make our empanadas has helped! Crimping the empanada edges with a fork has helped! Scoring ridges on our gnocchi dumplings has helped! Cracking and separating eggs has helped! Rolling our tortilla dough into little balls, pressing them into the tortilla press and then tossing them back and forth to lighten the dough has helped! You get the point! Dexterity comes from working in the kitchen!
5) I am really gifted and talented. I gain confidence in my abilities every day. When I crack eggs and separate them for my mom, some days I crack all the eggs perfectly. Other days one slips. I keep trying. I know that with practice, I improve every single day. The point is, I'm 3 years old, and I can separate and crack eggs almost flawlessly. This skill has been acquired over the last year. I feel pretty awesome!
When I wake up in the morning, I literally am a bundle of energy waiting to erupt. My mom, transforms this energy by allowing me to help out in our home. I can help her make the beds. I can help her transfer the laundry from the washer to the dryer. The most fun way to use up some of my energy, is to help her make breakfast every day. She'll set 3 eggs on the kitchen island, with a whisk, a large bowl, a bit of cream, and some salt and pepper. She'll say, "Ok darling, crack the eggs, add the cream, add a pinch of salt and pepper and whisk them up". And you know what. She can turn and look the other way and cut up our fruit for breakfast, while I get the eggs ready for her to scramble up. Then I wash my hands and I help her set the table. It might seem easier to throw me in front of the television, so she can get breakfast ready more quickly on her own, but revisit notes 1-5 above. You'll see why the time investment in allowing your little ones to help, is vitally important and rewarding in the long run. Many days, after we clean up our breakfast mess, my mom will let me help her prepare our dinner that will be slow braised all day. When I eat my food, I take a large amount of pride, in knowing that I helped make it!So for my older readers, please take some extra time and patience, and let your little ones help you out in the kitchen. For my younger readers, remember to follow instructions vigilantly. This will make your caretaker want to include you more often.
Enjoy your day. Cheers and Salute! Chef Izabella
For some cool recipes, check out my mom's site at: Cook Out Loud
HOME
IZZY'S DEMO VIDEOS
Hummus is Yummy, Easy and Healthy for you.
Hello there. 3 Year Old Chef Izabella here. My mom and I recently wrote a new recipe for "Italian White Bean Hummus". As the title suggests, our hummus is delicious, easy to make and it's even healthy for you too! White beans have a lot of protein in them. Since white beens (or cannellini beans) are the predominant ingredient in this recipe, our hummus is power packed with protein and flavor.
Do you or your neighbor have a lemon tree? Pull off a fresh lemon and get ready to use it in this delicious hummus dip. Also, get out your grater or zester and your juicer or reamer. We'll be using the outer skin of the lemon, which is called the zest. We'll then cut it in half and use the reamer to get the juice out. We like to juice our lemons over a strainer, so it catches the pulp and seeds. This way, we just get pure, perfect lemon juice for our recipes. Note, if you end up with extra lemon juice, just put it in an airtight, freezer safe container and freeze it. You can thaw it out the next time you need fresh lemon juice.
Make sure you have a parent or guardian help you out. Always be mindful of the food processor blade. Let the supervising adult handle the blade at all times. My younger readers can enjoy zesting the lemon (with supervision), juicing the lemon, and transferring all of the delicious ingredients into the food processor (being mindful of the blade at the bottom of the bowl). I use a spatula to transfer the hummus to a serving bowl. The more you cook, the bigger your muscles get. I'm only 3, but now I'm strong enough to hold the entire food processor bowl in one hand, and transfer the hummus with a spatula into a serving bowl, with the other hand.
We put hummus on our hamburgers and sandwiches. We also love to dip freshly cut vegetables, pita chips or pretzels in our hummus. We dip our fresh carrots from our garden into our hummus. It's uber- delicious! Here's the link to the recipe:
RECIPE FOR HUMMUS
HOME
IZZY'S DEMO VIDEOS
Do you or your neighbor have a lemon tree? Pull off a fresh lemon and get ready to use it in this delicious hummus dip. Also, get out your grater or zester and your juicer or reamer. We'll be using the outer skin of the lemon, which is called the zest. We'll then cut it in half and use the reamer to get the juice out. We like to juice our lemons over a strainer, so it catches the pulp and seeds. This way, we just get pure, perfect lemon juice for our recipes. Note, if you end up with extra lemon juice, just put it in an airtight, freezer safe container and freeze it. You can thaw it out the next time you need fresh lemon juice.
Make sure you have a parent or guardian help you out. Always be mindful of the food processor blade. Let the supervising adult handle the blade at all times. My younger readers can enjoy zesting the lemon (with supervision), juicing the lemon, and transferring all of the delicious ingredients into the food processor (being mindful of the blade at the bottom of the bowl). I use a spatula to transfer the hummus to a serving bowl. The more you cook, the bigger your muscles get. I'm only 3, but now I'm strong enough to hold the entire food processor bowl in one hand, and transfer the hummus with a spatula into a serving bowl, with the other hand.
We put hummus on our hamburgers and sandwiches. We also love to dip freshly cut vegetables, pita chips or pretzels in our hummus. We dip our fresh carrots from our garden into our hummus. It's uber- delicious! Here's the link to the recipe:
RECIPE FOR HUMMUS
HOME
IZZY'S DEMO VIDEOS
Crack, Mix, Grate, Tenderize, Frost, Garnish
CRACK. MIX. GRATE. TENDERIZE. FROST. GARNISH.
Hello there. 3 Year Old Chef Izabella here, writing a new post for my fellow foodie readers and eaters. I've heard from some of my younger followers, that they are trying new things in the kitchen with their caretakers, and they are having a lot of fun! This makes me incredibly happy. My mom even told me that some of her fellow mom friends have mentioned to her, that they are allowing their young kids to be more adventurous in the kitchen with them, as a result of seeing just how much I do in the kitchen, at the tender old age of 3! The truth is, we hear a lot of people generalize in a defeated tone, "I just don't know how to cook". Well, Rome was not built in a day. Just start out with simple steps.1. Always, always, always measure out your ingredients and place them in preparation bowls; set up your mise en place.
2. Have all your necessary pots, pans, bowls, utensils, etc, clean and ready to use.
3. Make sure you clear off extra unnecessary things off your counters, to give yourself a clutter free preparation area.
4. Clean as you go. I help my mom wash the dishes (she pulls the chair over so I can reach the sink and faucet). I love using the scrub brush and various color soaps to clean the dishes. Note, she does not allow me to wash anything sharp or hot. If you are a young reader, always adhere to the safety rules of your kitchen.
5. Print out a clear copy of the recipe you are following and place it somewhere in plain site, so you can follow the steps easily. Tip: if you have a magnetic hood range or refrigerator, use a magnet to hold up your recipe; or simply use a piece of tape to tape it to a visible cupboard. Or, if you prefer recipes via a tablet, place it in a safe spot, away from sunlight, so you can see the recipe clearly. Tip: Change your settings to disable sleep mode, while you are cooking, so you don't have to constantly refresh or type in your password on your tablet.
6. Read the recipe from start to finish before you begin. If there are terms or methods that you don't understand, look them up before you start. There are zillions of youtube videos that demonstrate how to do things. Wikipedia is a great resource, for looking up terms. It helps me out a lot.
7. Always, always, always, make your recipes with LOVE and TENDER CARE. Seriously, home made food usually tastes better, because it is made by loving hands.
The truth is, as a three year old chef, I'm still getting the hang of this cooking and baking thing. One thing I have to admit is that I get frustrated when things don't turn out exactly the way I want them to. I make mistakes but then I move on. I learn the most from my mistakes. Sometimes, while cracking several eggs, I'll drop one. But, because I keep trying, I do actually crack and separate several eggs perfectly.
Here's an easy recipe that my mom and I wrote for "Meat Loaf Mini's". Go ahead, try it! I think you'll like it.
Seriously, empower yourself, and try to bake or cook something new for you and your loved ones. There are several great, free recipes on the internet. You probably have 5 or more cookbooks somewhere in your pantry or kitchen. Dust off a cookbook and try a new recipe today!
Thanks for following my blog. Your comments are always welcome.
Salute. Chef Izabella
HOME
IZZY'S DEMO VIDEOS
Picnic "En Papillote" (in paper)
Hello fellow foodie friends. Chef Izabella (aka Chef Izzy) here. I recently turned 3. I'm loving it so far! I'm learning new techniques in the kitchen. I'm having fun experimenting with fun food combinations: sweet and savory foods together and I also really like pairing sweet foods with a hint of spice (I know it sounds weird, since I'm only 3, but my taste buds want what my taste buds want).
I really love living in Southern California, as we have access to delicious, fresh, locally grown produce all year long. Seriously, this is an incredible blessing!
Lately, my mom and I have been making creative dishes like mini frittatas, empanadas, risotto, quiches, soups (with fresh stocks), mini muffins, biscotti, tarts, slow braised meals with fun sauces and more. We cook together in the kitchen at least three times a week. I am always supervised by my mom or dad when I'm in the kitchen, and I always adhere to the safety rules and guidelines that my parents set for me while I'm in the kitchen (important reminder for all of my younger readers).
I highly recommend that you spend quality time in the kitchen with someone you love, at least two to three times a week! You can share the yummy stuff you make, with loved ones, friends and neighbors. Shared homemade food is like a big warm hug for the soul.
Well, back to this post. Sandwiches are great for picnics, but I recommend trying something creative, tasty and new for your next outdoor meal. As the title suggests, I'll be talking about cooking "in paper". In Italy, they cook in parchment paper and it's called "al cartoccio". In France, they cook in parchment paper and it's called "en papillote". This is a really cool technique in which you can bake veggies and meat or just veggies in parchment paper. You place the food inside the paper and fold the edges of the paper so all the air stays inside the paper, creating a steaming effect. The flavors are bold, delicious and incredibly healthy. I recommend using chicken, pork or shrimp. Almost any vegetable would be fine. Keep in mind that you want your veggies to be cut in similar sizes, so that the cooking time is the same. For instance, if you are going to use carrots, potatoes and squash, I recommend that you julienne the pieces. You can throw some frozen peas on top if you want. I like to place a fresh sprig of some type of herb on top. Make sure that your meat is cut into thin, little strips and keep them all about the same size (if using shrimp, just clean, devein and place a few pieces of shrimp in a row; no need to slice the shrimp). Always wash your hands well and have your parent or caretaker clean the work surfaces really well after handling meat, seafood or eggs.
I really love living in Southern California, as we have access to delicious, fresh, locally grown produce all year long. Seriously, this is an incredible blessing!
Lately, my mom and I have been making creative dishes like mini frittatas, empanadas, risotto, quiches, soups (with fresh stocks), mini muffins, biscotti, tarts, slow braised meals with fun sauces and more. We cook together in the kitchen at least three times a week. I am always supervised by my mom or dad when I'm in the kitchen, and I always adhere to the safety rules and guidelines that my parents set for me while I'm in the kitchen (important reminder for all of my younger readers).
I highly recommend that you spend quality time in the kitchen with someone you love, at least two to three times a week! You can share the yummy stuff you make, with loved ones, friends and neighbors. Shared homemade food is like a big warm hug for the soul.
Well, back to this post. Sandwiches are great for picnics, but I recommend trying something creative, tasty and new for your next outdoor meal. As the title suggests, I'll be talking about cooking "in paper". In Italy, they cook in parchment paper and it's called "al cartoccio". In France, they cook in parchment paper and it's called "en papillote". This is a really cool technique in which you can bake veggies and meat or just veggies in parchment paper. You place the food inside the paper and fold the edges of the paper so all the air stays inside the paper, creating a steaming effect. The flavors are bold, delicious and incredibly healthy. I recommend using chicken, pork or shrimp. Almost any vegetable would be fine. Keep in mind that you want your veggies to be cut in similar sizes, so that the cooking time is the same. For instance, if you are going to use carrots, potatoes and squash, I recommend that you julienne the pieces. You can throw some frozen peas on top if you want. I like to place a fresh sprig of some type of herb on top. Make sure that your meat is cut into thin, little strips and keep them all about the same size (if using shrimp, just clean, devein and place a few pieces of shrimp in a row; no need to slice the shrimp). Always wash your hands well and have your parent or caretaker clean the work surfaces really well after handling meat, seafood or eggs.
Dress It Up!!!
Hello my fellow foodie friends. Chef Izabella here. I'm also known as "Chef Izzy". I turned 3 recently. Oh, the sage that comes with age. I'm feeling more wise every day. With this newfound wisdom, I can safely say that my most sagacious advice that I can impart to you today, is that it is vitally important to have fun while cooking in the kitchen. One way I like to have fun in the kitchen is to "dress it up". First, dress it up - meaning wear your best gown, tiara and glass slippers, while you cook. Wear an apron of course! It's always more fun to impersonate a princess while baking or cooking with loved ones. Secondly, dress up your food with accessories, flare and fun as well. I recently helped my mom bake a jelly roll cake with a strawberry fruit and freshly whipped cream filling. We made a cream cheese frosting. We transformed the frosting into my three favorite colors, purple, pink and aqua (using food color gels). We also purchased fun candies in which to decorate my birthday cake. The one thing my mom said was "there are no rules when it comes to decorating". She let me put all three frosting colors on the cake.** She let me place the candies wherever I wanted. I had such an absolute blast helping my mom make my own birthday cake. We laughed the entire time. In fact, she asked me "what do you want to do for your birthday today?". We could have gone to the beach, to the zoo, to the movies... anything. My reply was, "let's bake my strawberry cake". We wore dresses, tiaras and jewelry with pizzazz and flare! We dressed up our cake with vibrant colors, candies and lots of love! So what are you waiting for? Grab a loved one, pick out a fun recipe, put on a fun costume or gown, accessorize your outfit and your food*. Play some funky music. Have fun. Laugh a lot. And, as my mom always says, "Cook Out Loud".
*Note, you can accessorize your food dishes with fresh herbs, edible flowers, creative candies, pinches of ground spices or dried herbs, fun sauces with multiple colors, and more. Get creative!
I'd love to hear your ideas and input on how you like to "dress it up" in the kitchen. Write a comment on my blog, www.CookingWithIzzy.com
Salute and Cheers, Chef Izabella
HOME
IZZY'S DEMO VIDEOS
Spice Up "Taco Tuesdays"
Hi, 2 year old Chef Izabella here, also known as Chef Izzy. As the title of this post suggests, I'm going to be talking about spice! In the obvious sense, one can spice up tacos by adding delicious spice to the sauces on one's taco platter. For instance, one can add some chile peppers, jalapeƱos, or cayenne pepper, to one's salsa or tomatillo sauce. One can slow braise the meat with hot spices as well.
In a more figurative sense, I am suggesting that you add spice, flare, fun, and color to your taco Tuesday dinner, with one creative, yet easy step.
Just add colored food gel to your homemade tortillas!
Make the tortilla dough and portion it into 16 pieces. Roll the small dough pieces into little balls. At this stage, add just a hint of colored food gel to each little dough ball and work the colored gel into the dough with your hands.
If you want more than one color in your tortillas, then add a unique color to each dough ball.
You can mix a couple of the dough balls together, but then divide them into smaller dough ball portions before you flatten them.
Using a plastic food storage bag (that is cut into two square pieces) place the plastic sheets over each hard plate of your tortilla press. Then press each tortilla ball into a flat tortilla shape. The plastic will do two things: 1) protect your tortilla press from staining from the food gels and 2) Keep the dough from sticking to the tortilla press itself (great for easier clean up).
Then toss the tortillas back and forth in your hands to lighten the dough.
Place the tortillas on a hot griddle or comal for about 45 seconds on each side.
Place the cooked tortillas in a tortilla warmer between a towel.
Enjoy the colorful tortillas any day of the week but get especially creative and spicy on Taco Tuesdays.
Keep it creative, colorful and fun in the kitchen.
Salute - Chef Izabella (Chef Izzy)
HOME
IZZY'S DEMO VIDEOS
Just add colored food gel to your homemade tortillas!
Make the tortilla dough and portion it into 16 pieces. Roll the small dough pieces into little balls. At this stage, add just a hint of colored food gel to each little dough ball and work the colored gel into the dough with your hands.
If you want more than one color in your tortillas, then add a unique color to each dough ball.
You can mix a couple of the dough balls together, but then divide them into smaller dough ball portions before you flatten them.
Using a plastic food storage bag (that is cut into two square pieces) place the plastic sheets over each hard plate of your tortilla press. Then press each tortilla ball into a flat tortilla shape. The plastic will do two things: 1) protect your tortilla press from staining from the food gels and 2) Keep the dough from sticking to the tortilla press itself (great for easier clean up).
Then toss the tortillas back and forth in your hands to lighten the dough.
Place the tortillas on a hot griddle or comal for about 45 seconds on each side.
Enjoy the colorful tortillas any day of the week but get especially creative and spicy on Taco Tuesdays.
Keep it creative, colorful and fun in the kitchen.
Salute - Chef Izabella (Chef Izzy)
HOME
IZZY'S DEMO VIDEOS
My Favorite Gadgets in the Kitchen
Hi, Chef Izabella here. I love cool gadgets. My dad is an engineer. My mom is a rocking culinary guru. Clearly, I have inherited a passion for using cool gadgets in the kitchen. I wanted to share a few of my favorite kitchen tools with you.
These 5 gadgets are absolute must-haves in my kitchen.
1) Citrus Reamer. This affordable and easy to use tool is great for getting the most juice out of citrus in a fast and efficient manner. My mom slices the citrus in half. I hold one half of the citrus in my right hand. I hold the reamer in my left hand and I squish the fruit flesh, releasing the juices into a bowl below. Sometimes we put a small strainer over the bowl, to catch the seeds. Note, if we were going to juice 40 oranges, we'd probably use a larger juicer. This tool is great when one needs to juice 1-3 pieces of citrus for a particular recipe.
Here is a link to a reamer: Citrus Reamer
2) Microplane Zester. My mom has been teaching me how
to cautiously and safely use a microplane zester. We use this for citrus zest, grating nutmeg, or shaving chocolate. I make sure to wrap my fingers up around the object that I'm grating, to avoid hurting my fingers. I gently move the food across the grater. We usually place the grater over a bowl, to catch the zest, grated nutmeg or tiny slivers of chocolate. If you are zesting citrus, flip the zester over, and push your finger along the bottom (non sharp) edge of the microplane, to get the extra zest that has built up. For my younger readers, this is an acquired skill. Please do not attempt to try the zester until your care taker allows you to. We like to rinse our microplane right after each use, and set it in the drying rack. If we wait to clean it, the food tends to stick to it. This is a key tool for adding fresh, delicious flavor to our dishes.
Here is a link to a zester: microplane zester
3) Digital Food Scale. Keep your recipe consistent each time you make it. Did you know the common "dip and sweep" way you use a measuring cup to measure your flour, can add up to 10% more than the recipe actually calls for. When we bake, we use very precise measurements. Having a digital food scale, is awesome at ensuring accuracy. Most scales will allow you to convert grams to ounces (if you need it). You can also zero out the weight of the plate or bowl that you want your food on and then slowly add the food ingredient to the scale (this is called the tare function). I couldn't imagine our kitchen without a digital scale.
4) Food Processor. My mom is the only one who handles the sharp blades in our kitchen. She'll help me set up the food processor. We measure out all of our ingredients. I am allowed to carefully add the ingredients into the top part of the food processor (so I don't get near the blade). Once the lid is safely on, mom lets me push the pulse or start buttons. I love pushing the off button too! I am allowed to safely scrape down the sides of the food processor with a spatula. My mom removes the blade and I get to transfer the yummy sauce or dough to a serving bowl or preparation container. A food processor makes making sauces or doughs super quick and easy! For example, we make a pate brisee dough, pesto, hummus, dressings and more... in 5 minutes or less. Plus, for a pate brisee dough, a food processor is great, because you aren't handling the dough as much (over handling dough with hands, warms up the dough). You want all of your ingredients to stay as cold as possible. We use our mini food processor to quickly chop up nuts, chunks of chocolate or dried fruit (like banana chips).
5) 24 Mini Muffin Tin. I love to make mini treats. We use our 24 Mini muffin tins to make mini muffins, mini quiches, mini tarts, mini cupcakes and more. You can line them with adorable mini muffin foil or paper cups. Or, you can spray the tin itself with a non-stick spray, and simply put your food directly into the muffin tin itself. We have a lot of tea parties at my house. Our mini muffin tin gets used at least once a week.
Your input and thoughts are always appreciated. What are your favorite 5 gadgets in your kitchen?
Salute,
Chef Izabella (aka: Chef Izzy)
HOME
IZZY'S DEMO VIDEOS
These 5 gadgets are absolute must-haves in my kitchen.
1) Citrus Reamer. This affordable and easy to use tool is great for getting the most juice out of citrus in a fast and efficient manner. My mom slices the citrus in half. I hold one half of the citrus in my right hand. I hold the reamer in my left hand and I squish the fruit flesh, releasing the juices into a bowl below. Sometimes we put a small strainer over the bowl, to catch the seeds. Note, if we were going to juice 40 oranges, we'd probably use a larger juicer. This tool is great when one needs to juice 1-3 pieces of citrus for a particular recipe.
Here is a link to a reamer: Citrus Reamer
2) Microplane Zester. My mom has been teaching me how
to cautiously and safely use a microplane zester. We use this for citrus zest, grating nutmeg, or shaving chocolate. I make sure to wrap my fingers up around the object that I'm grating, to avoid hurting my fingers. I gently move the food across the grater. We usually place the grater over a bowl, to catch the zest, grated nutmeg or tiny slivers of chocolate. If you are zesting citrus, flip the zester over, and push your finger along the bottom (non sharp) edge of the microplane, to get the extra zest that has built up. For my younger readers, this is an acquired skill. Please do not attempt to try the zester until your care taker allows you to. We like to rinse our microplane right after each use, and set it in the drying rack. If we wait to clean it, the food tends to stick to it. This is a key tool for adding fresh, delicious flavor to our dishes.
Here is a link to a zester: microplane zester
3) Digital Food Scale. Keep your recipe consistent each time you make it. Did you know the common "dip and sweep" way you use a measuring cup to measure your flour, can add up to 10% more than the recipe actually calls for. When we bake, we use very precise measurements. Having a digital food scale, is awesome at ensuring accuracy. Most scales will allow you to convert grams to ounces (if you need it). You can also zero out the weight of the plate or bowl that you want your food on and then slowly add the food ingredient to the scale (this is called the tare function). I couldn't imagine our kitchen without a digital scale.
4) Food Processor. My mom is the only one who handles the sharp blades in our kitchen. She'll help me set up the food processor. We measure out all of our ingredients. I am allowed to carefully add the ingredients into the top part of the food processor (so I don't get near the blade). Once the lid is safely on, mom lets me push the pulse or start buttons. I love pushing the off button too! I am allowed to safely scrape down the sides of the food processor with a spatula. My mom removes the blade and I get to transfer the yummy sauce or dough to a serving bowl or preparation container. A food processor makes making sauces or doughs super quick and easy! For example, we make a pate brisee dough, pesto, hummus, dressings and more... in 5 minutes or less. Plus, for a pate brisee dough, a food processor is great, because you aren't handling the dough as much (over handling dough with hands, warms up the dough). You want all of your ingredients to stay as cold as possible. We use our mini food processor to quickly chop up nuts, chunks of chocolate or dried fruit (like banana chips).
5) 24 Mini Muffin Tin. I love to make mini treats. We use our 24 Mini muffin tins to make mini muffins, mini quiches, mini tarts, mini cupcakes and more. You can line them with adorable mini muffin foil or paper cups. Or, you can spray the tin itself with a non-stick spray, and simply put your food directly into the muffin tin itself. We have a lot of tea parties at my house. Our mini muffin tin gets used at least once a week.
Your input and thoughts are always appreciated. What are your favorite 5 gadgets in your kitchen?
Salute,
Chef Izabella (aka: Chef Izzy)
HOME
IZZY'S DEMO VIDEOS
Mise En Place (Putting In Place)
Hello Everyone. Chef Izabella here. My friends and family call my Izzy for short.
My post today is intended to encourage everyone to have more peace, fun and confidence in the kitchen. This one easy step, as the post title suggests, is "Mise en Place". Put everything in place, before you start cooking (this is a French phrase), and everything will fall into place effortlessly. You can set out a large baking sheet and line it with parchment paper. Measure out all of your ingredients into preparation bowls or plates. Place the measured ingredients onto the baking sheet and set it aside. Once you start to bake or cook your food, bring out the "mise en place" tray. Be sensitive to things that should be refrigerated right up until you cook it. You can still pre-measure it and place it back in the refrigerator until you are ready to use it. Most restaurants implement the "mise en place" trays in their kitchens. This keeps everything organized and running smoothly.
I recommend that we all do this in our own home kitchens. My mom does this any time we are going to cook or bake together. I like to help her prepare our "mise en place". This way I can simply pour the ingredients into the mixing bowls or dishes and voila... our cooking and baking is effortless. Sometimes we transfer the items off of the tray onto the counter, where we are working, simply to save space. You figure out what organization system works best for you, and then do it! There is nothing worse than being right in the middle of cooking or baking something, but not being able to find an ingredient. Then one runs around the pantry or the kitchen like a silly goose, looking for an ingredient that could have been prepped or measured in advance.
Save yourself time and agony, and prepare and measure your ingredients out before you start cooking or baking. Be prepared. Be organized. Have more fun!!! Thank you for reading my thoughts for the day. I hope you are enjoying yourself in the kitchen! Cheers, Chef Izabella (aka: Chef Izzy)
HOME
IZZY'S DEMO VIDEOS
My post today is intended to encourage everyone to have more peace, fun and confidence in the kitchen. This one easy step, as the post title suggests, is "Mise en Place". Put everything in place, before you start cooking (this is a French phrase), and everything will fall into place effortlessly. You can set out a large baking sheet and line it with parchment paper. Measure out all of your ingredients into preparation bowls or plates. Place the measured ingredients onto the baking sheet and set it aside. Once you start to bake or cook your food, bring out the "mise en place" tray. Be sensitive to things that should be refrigerated right up until you cook it. You can still pre-measure it and place it back in the refrigerator until you are ready to use it. Most restaurants implement the "mise en place" trays in their kitchens. This keeps everything organized and running smoothly.
I recommend that we all do this in our own home kitchens. My mom does this any time we are going to cook or bake together. I like to help her prepare our "mise en place". This way I can simply pour the ingredients into the mixing bowls or dishes and voila... our cooking and baking is effortless. Sometimes we transfer the items off of the tray onto the counter, where we are working, simply to save space. You figure out what organization system works best for you, and then do it! There is nothing worse than being right in the middle of cooking or baking something, but not being able to find an ingredient. Then one runs around the pantry or the kitchen like a silly goose, looking for an ingredient that could have been prepped or measured in advance.
Save yourself time and agony, and prepare and measure your ingredients out before you start cooking or baking. Be prepared. Be organized. Have more fun!!! Thank you for reading my thoughts for the day. I hope you are enjoying yourself in the kitchen! Cheers, Chef Izabella (aka: Chef Izzy)
HOME
IZZY'S DEMO VIDEOS
Tea Parties are More Fun With Mini Treats
Hi, Izzy here. I've been cooking up a storm with my mom lately. We've been laughing a lot and enjoying our time together in the kitchen immensely.
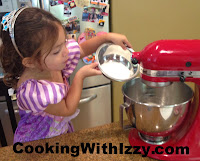
I'm 2.5, so naturally, I'm totally into tea parties!
I love to have tea parties with my friends and family members. We like to put water, juice, milk or room temperature herbal tea, into our sophisticated tea cups. We feel like big girls. I like to serve delectable, edible treats at my tea parties as well.
Lately, my mom and I have been making bite size treats (also known in French as an "amuse-bouche"). One can eat them in a few bites or less.
Two treats in particular that I love for our tea parties are mini quiches and mini scones. Here are links to a couple great recipes:
My Mom's Mini Quiches
My Mom's Strawberry Scones
I like to serve a savory treat and a sweet treat at my tea parties. I like to appeal to everyone's palette. Let's face it, some of us have sweet-tooth's and some of us crave salt!
You can modify most recipes and make them into mini-treats, by adjusting the portion size and baking time.
For instance, if we are taking a regular sized recipe but baking it in mini-size-portions, my mom and I usually start by cutting the baking time in half and then we add more time in increments of 2-3 minutes at a time (to avoid burning).* For instance, our regular size scone recipe bakes for 18-25 minutes. Our mini scone recipe bakes for 11-16 minutes. We use the same exact ingredients, but we cut the large scone loaf in half and then portion the two loaves into 16 wedges instead of 8. So, it's really easy! You can experiment with cooking times or just look for recipes that offer mini portion serving sizes. You can find several recipes on-line.
The bottom line, is that life is short and it should be celebrated with beloved family members and friends. My mom and I like to show people that we care about them, by cooking or baking for them. If someone you know is going through a difficult time in life, maybe you and your caretaker can bring them some food. I've never met anyone, who received a home baked or home cooked treat, who didn't smile as a result. So spread the love. Spread the smiles. Share some food!
* Note, fellow toddlers, I always let my mom handle the hot oven-related stuff in the kitchen. She also deals with all the cutting and blade-related tasks. You must adhere to the safety laws of the kitchen!
HOME
IZZY'S DEMO VIDEOS
I'm 2.5, so naturally, I'm totally into tea parties!
I love to have tea parties with my friends and family members. We like to put water, juice, milk or room temperature herbal tea, into our sophisticated tea cups. We feel like big girls. I like to serve delectable, edible treats at my tea parties as well.
Lately, my mom and I have been making bite size treats (also known in French as an "amuse-bouche"). One can eat them in a few bites or less.
Two treats in particular that I love for our tea parties are mini quiches and mini scones. Here are links to a couple great recipes:
My Mom's Mini Quiches
My Mom's Strawberry Scones
I like to serve a savory treat and a sweet treat at my tea parties. I like to appeal to everyone's palette. Let's face it, some of us have sweet-tooth's and some of us crave salt!
You can modify most recipes and make them into mini-treats, by adjusting the portion size and baking time.
For instance, if we are taking a regular sized recipe but baking it in mini-size-portions, my mom and I usually start by cutting the baking time in half and then we add more time in increments of 2-3 minutes at a time (to avoid burning).* For instance, our regular size scone recipe bakes for 18-25 minutes. Our mini scone recipe bakes for 11-16 minutes. We use the same exact ingredients, but we cut the large scone loaf in half and then portion the two loaves into 16 wedges instead of 8. So, it's really easy! You can experiment with cooking times or just look for recipes that offer mini portion serving sizes. You can find several recipes on-line.
The bottom line, is that life is short and it should be celebrated with beloved family members and friends. My mom and I like to show people that we care about them, by cooking or baking for them. If someone you know is going through a difficult time in life, maybe you and your caretaker can bring them some food. I've never met anyone, who received a home baked or home cooked treat, who didn't smile as a result. So spread the love. Spread the smiles. Share some food!
* Note, fellow toddlers, I always let my mom handle the hot oven-related stuff in the kitchen. She also deals with all the cutting and blade-related tasks. You must adhere to the safety laws of the kitchen!
HOME
IZZY'S DEMO VIDEOS
Homemade Dressing Rocks!
Hi, Izzy here. Most of my fellow foodies out there would have to agree, that although making homemade dressing takes a little bit of time and energy, it is well worth the effort! I like to help my mom whisk up homemade dressings for my vegetables. I like to eat vegetables in several different forms: raw, steamed, mashed, sauteed, as a salad, grilled, etc. The common denominator, regardless of how the vegetables are prepared, is that I love to have fresh dressing with my vegetables. Sometimes I drizzle the fresh dressing over my vegetables. Other times I like to dip my veggies into a bowl of freshly made dressing. Here is a link to an easy recipe for GINGER, ORANGE DRESSING. As a rule of thumb, I usually use a 2 to 1 ratio. I use 2 parts vinegar, to 1 part olive oil. I think the key to great dressing, is to use good quality ingredients. I like to use fresh herbs, alliums, fresh ginger, fresh garlic, good grainy mustard (to get a good emulsification in my dressing), great quality vinegar and olive oil, and usually fresh citrus juice and zest in my dressings. You can mix it up though and use whatever you have on hand. My mom does all the dicing (I don't use real knives yet, since I'm only two). I use a large bowl and I whisk all of the ingredients together for a few minutes. Then my mom hands me the sieve or strainer and I strain the dressing. Sometimes we opt to keep the chunks in the dressing and we avoid this step. Other times, I do prefer to strain the dressing through a sieve for a smoother texture. We transfer the dressing to a cute airtight dressing jar and then we serve it alongside vegetables. We usually store our dressing in the airtight container in the refrigerator for about a week. Well, it usually doesn't even last that long, because we eat it all up! I hope I have encouraged you to be bold with making homemade dressings at home. Sure, it's easier to use a store bought dressing. It's more fun though, to get creative and to use bold, fresh flavors with every snack or meal.
Here's a quick tip to my fellow toddlers out there: When you are shopping in the grocery store, help your caretaker find a few fresh dressing ingredients and encourage him or her to keep them on hand in the refrigerator. For instance, a chunk of ginger, a few sprigs of thyme, a shallot and an organic orange, will last for a couple weeks in your refrigerator. If a good quality olive oil or vinegar goes on sale at the store, pick an extra bottle up for your pantry. You and your caretaker will be more inclined to make fresh dressings if you already have the ingredients on hand. As my grandpa Sergi used to always say, Salute!
HOME
IZZY'S DEMO VIDEOS
Subscribe to:
Posts (Atom)


